What Happens During a Backflow Test Inspection: A Step-by-Step Guide
What Happens During a Backflow Test Inspection
If you've received a notice from your water utility saying your backflow preventer needs testing, you're probably wondering what the process actually involves. Maybe you've never even seen the device on your property, let alone watched someone test it. The good news: backflow testing is straightforward, usually takes less than 30 minutes, and doesn't require you to do much beyond granting access.
Here's a step-by-step breakdown of what happens before, during, and after a backflow test inspection — whether you're a homeowner, property manager, or commercial building operator.
Why Backflow Testing Is Required
Before getting into the mechanics, it helps to understand why this inspection exists. Backflow preventers stop contaminated water from flowing backward into the public drinking water supply. Without a functioning device, a sudden pressure drop in the municipal line — from a water main break, heavy fire hydrant use, or nearby construction — could pull chemicals, fertilizers, or other hazardous substances from your property's plumbing back into the community's water.
Most municipalities and water districts require annual testing of backflow prevention assemblies. Some jurisdictions require it every year without exception. Others only require testing on commercial properties or properties with irrigation systems, fire suppression lines, or other high-hazard connections. Either way, the test must be performed by a certified backflow tester — not a general plumber, unless that plumber also holds the proper certification.
Before the Tester Arrives
Know Where Your Device Is
Backflow preventers are typically installed near the water meter or at the point where a secondary water line branches off — such as an irrigation line or fire sprinkler connection. Common locations include:
- Residential properties: Near the front of the house by the water meter, in a below-grade valve box, or along the side of the building near the irrigation connection
- Commercial properties: In a mechanical room, near the main water service entrance, in a dedicated backflow vault, or outside near the fire department connection
- Multi-unit buildings: Often in a utility room, parking garage, or external pit accessible from the sidewalk or lot
If you can't find it, your water district may have records showing its location. You can also ask your tester ahead of time — experienced testers are used to tracking these down.
Clear the Area
Make sure the tester can physically reach the device. Move trash cans, stored materials, landscaping equipment, or vehicles out of the way. For below-grade installations, check that the lid isn't buried under soil or mulch. A tester who can't access the device will need to reschedule, and some companies charge for a return trip.
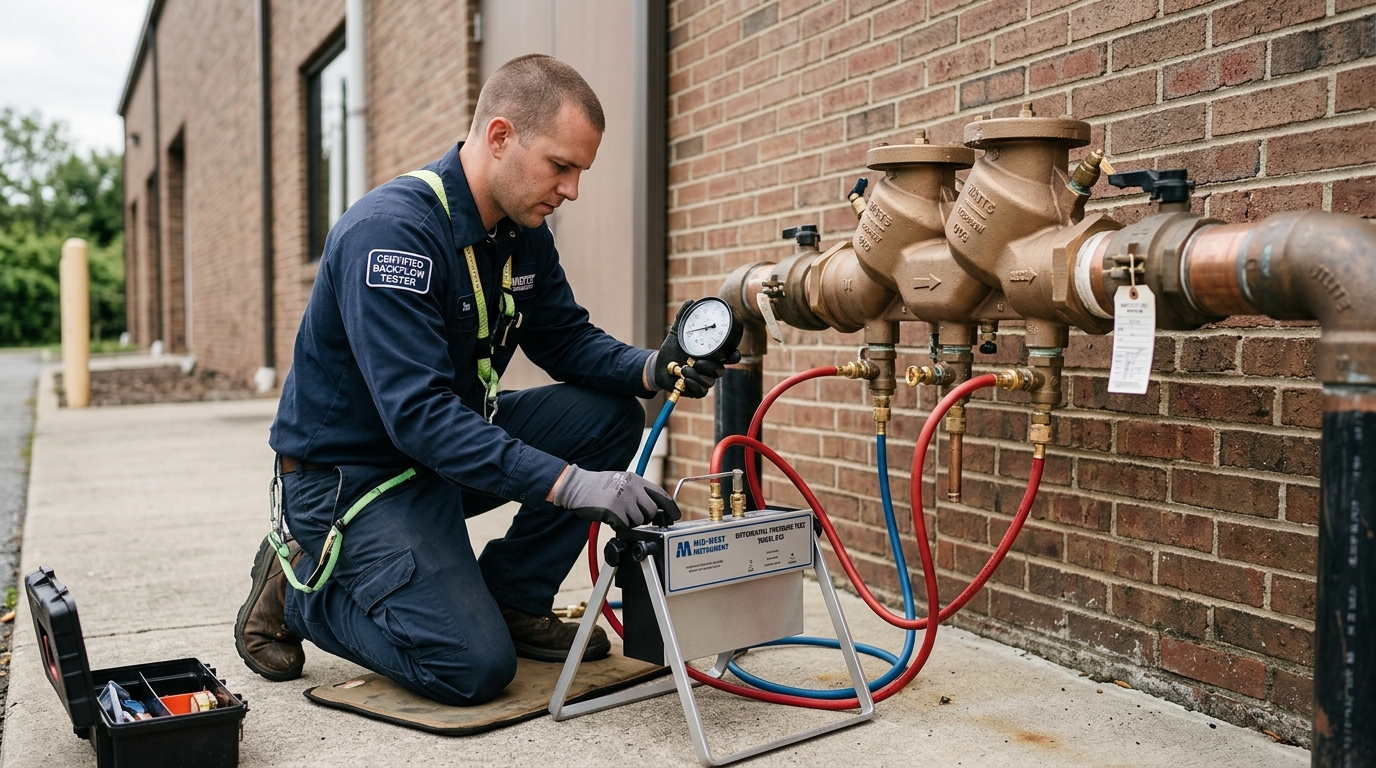
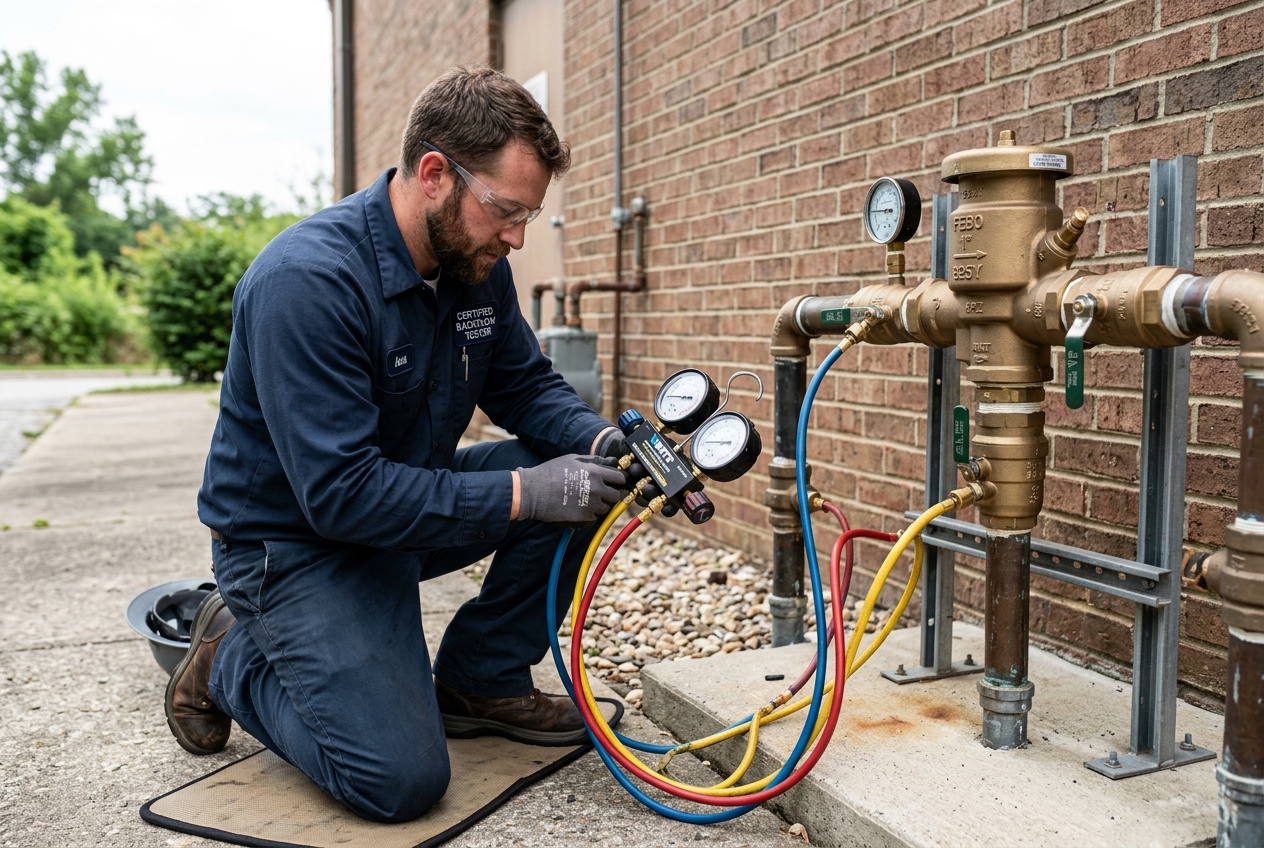 Certified backflow tester kneeling beside an above-ground reduced pressure zone backflow preventer with a differential pressure test kit connected to the test cocks
The Testing Process Step by Step
Step 1: Visual Inspection
The tester starts with a visual check of the assembly. They're looking for:
- Physical damage — cracks in the body, corrosion, broken fittings, or missing caps on the test cocks
- Proper installation — correct orientation, adequate clearance for maintenance, and no unapproved modifications
- Leaks — any water seeping from the body, relief valve, or connections
- Environmental hazards — submersion in standing water (a serious compliance problem for reduced pressure zone assemblies), insect nests, or debris inside valve boxes
If the tester spots a significant installation problem — like a device installed backward or a reduced pressure zone (RPZ) assembly buried below grade with no drainage — they'll note it. Depending on the issue, they may not be able to proceed with testing until the installation is corrected.
Step 2: Connecting the Test Kit
The tester connects a differential pressure test gauge to the assembly's test cocks. Most backflow preventers have three or four small brass ports (test cocks) along the body, each with a quarter-turn valve. The tester attaches hoses from their gauge kit to these ports.
The test kit itself is a calibrated instrument — typically a differential pressure gauge accurate to fractions of a PSI. Testers are required to have their gauges calibrated annually, and many jurisdictions require proof of calibration before accepting test results.
Step 3: Running the Diagnostic Tests
This is the core of the inspection. The specific tests depend on the type of backflow preventer installed, but most assemblies get checked in a similar sequence.
For Double Check Valve Assemblies (DCVA):
- The tester closes downstream shutoff valves to isolate the assembly
- They test the second check valve first by measuring the pressure differential across it — a properly seated check valve will hold pressure and prevent backflow
- Then they test the first check valve the same way
- Each check valve must hold a minimum pressure differential (usually 1.0 PSI) to pass
For Reduced Pressure Zone Assemblies (RPZ):
- Same isolation and sequential testing of both check valves
- Additionally, the tester evaluates the relief valve (the component that opens and dumps water if both checks fail)
- The relief valve must open before the pressure differential drops to zero — this is the RPZ's fail-safe mechanism
- RPZ testing often involves some water discharge from the relief valve, which is normal
For Pressure Vacuum Breakers (PVB) and Spill-Resistant Vacuum Breakers (SVB):
- The tester checks the air inlet valve to confirm it opens at the correct pressure
- They verify the check valve holds adequate pressure
- PVBs may release a small amount of water during testing
The entire diagnostic sequence typically takes 10 to 20 minutes, depending on the device type and condition.
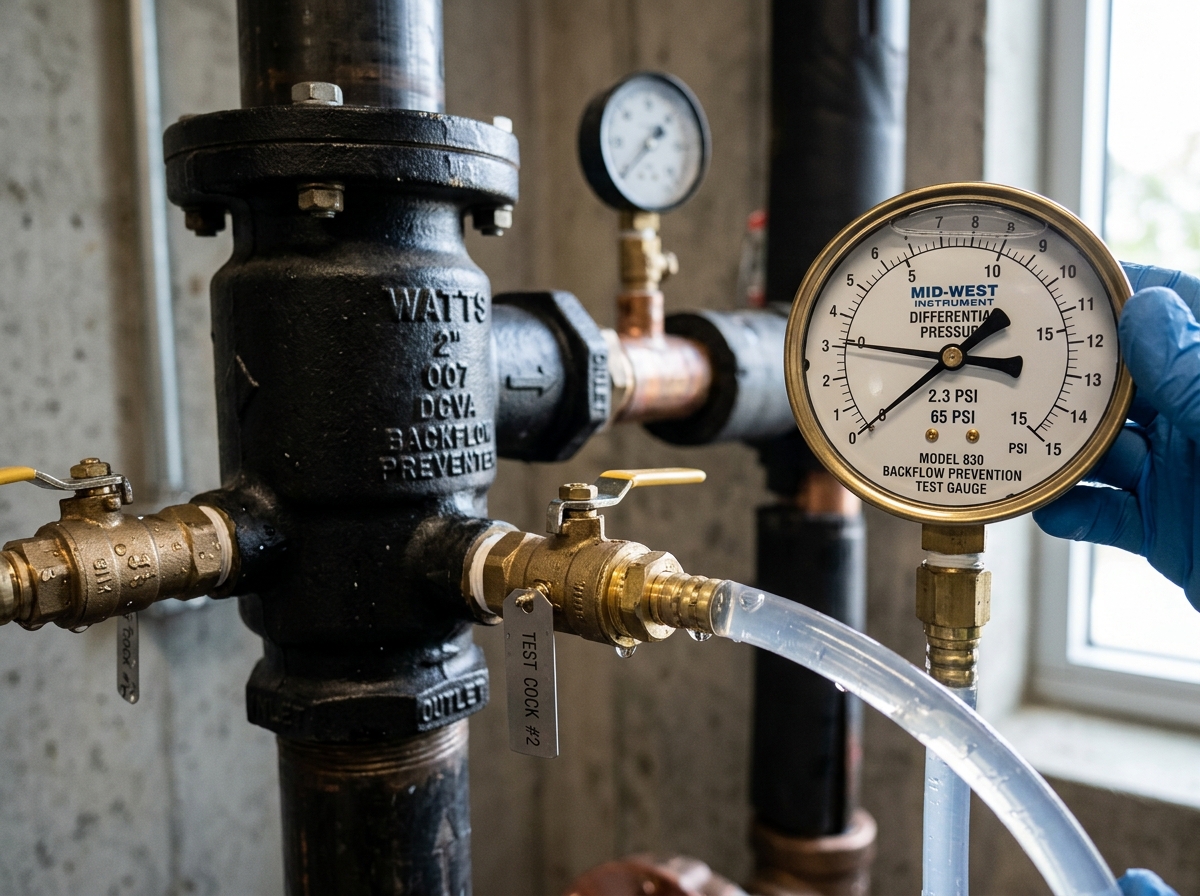 Close-up of a differential pressure test gauge connected to the test cocks on a double check valve assembly showing pressure readings during inspection
Step 4: Recording Results
After testing, the certified tester records the results on an official test report form. This form includes:
- Property address and owner information
- Assembly details — manufacturer, model, serial number, size, and location on the property
- Test readings — the actual pressure differentials measured for each check valve and (for RPZs) the relief valve opening point
- Pass or fail determination for each component
- Tester's certification number and gauge serial number
- Date of test and date gauge was last calibrated
Most jurisdictions require the tester to submit this report directly to the water purveyor or health department within a set timeframe — often 10 to 30 days. Many testers now submit reports electronically through compliance platforms, which speeds up the process.
What Happens If Your Device Fails
A failed test doesn't mean your water is unsafe right now — it means the device isn't providing reliable backflow protection and needs repair. Here's the typical sequence after a failure:
The tester identifies the problem. Common failures include worn check valve seats, fouled check valve discs, a stuck relief valve, or debris lodged in the assembly.
Repairs are made. In many cases, the same tester can perform the repair on the spot if they carry common repair kits. Typical repairs involve replacing rubber seats, springs, or o-rings inside the check valve modules. More serious damage — cracked bodies, severe corrosion — may require replacing the entire assembly.
A retest is performed. After any repair, the assembly must be retested to confirm it now passes. This retest follows the same procedure as the original test.
Passing results are submitted. The tester files the passing report with your water district.
Repair costs vary widely. A simple check valve seat replacement might run $50 to $150 in parts and labor. Replacing an entire RPZ assembly on a commercial property can cost $1,000 to $5,000 or more depending on size and installation complexity.
Timelines Matter
Most water districts give you a specific window to complete repairs and retesting after a failure — often 30 to 60 days. If you miss this deadline, consequences range from warning letters to fines, and in some cases, the water district can shut off your service until the device passes. Take failed results seriously and schedule repairs promptly.
How Long Does the Whole Visit Take?
For a single residential backflow preventer that passes on the first try, expect 15 to 30 minutes from arrival to completion. Commercial properties with multiple assemblies will take longer — budget roughly 20 minutes per device. If repairs are needed on-site, add another 30 to 60 minutes depending on the complexity.
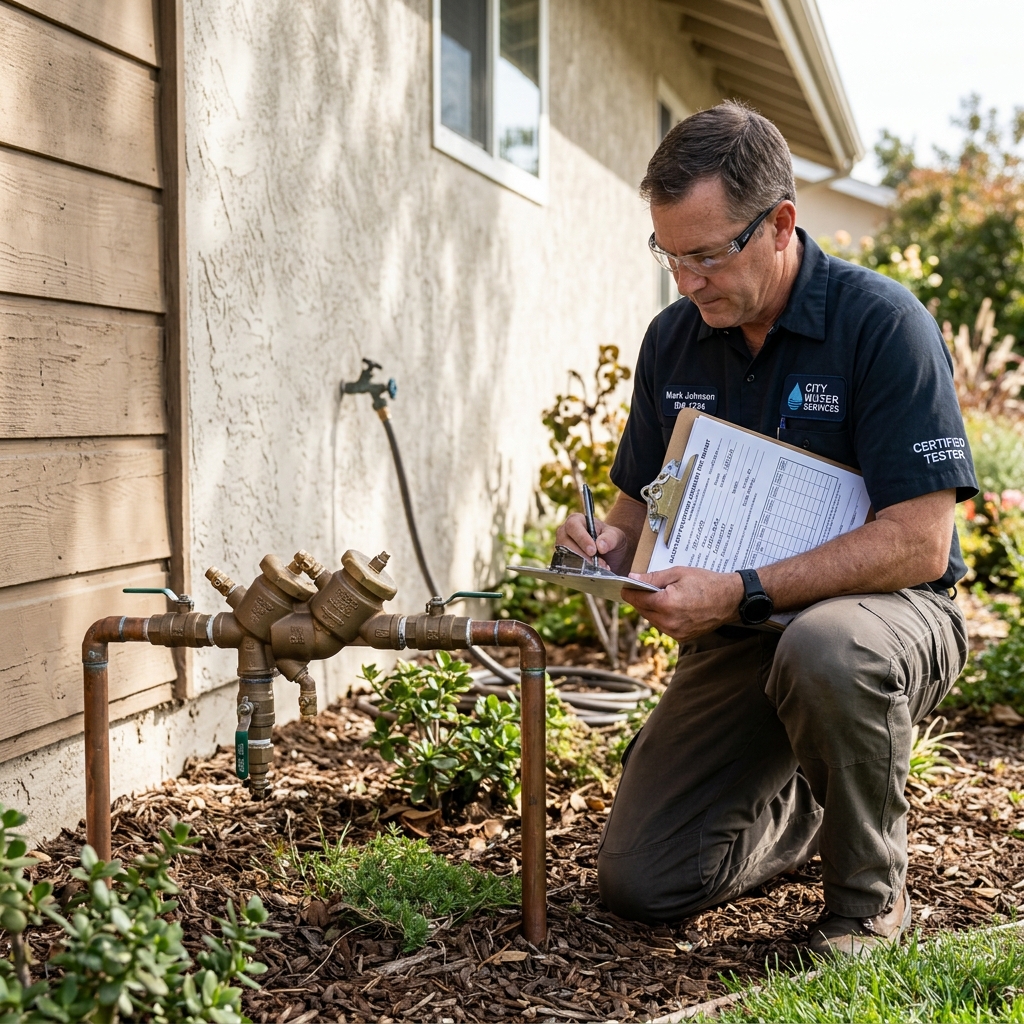 Backflow tester filling out a test report form on a clipboard next to an irrigation system backflow preventer on the side of a residential property
What It Costs
Backflow testing fees vary by region, but for 2026, typical ranges are:
- Single residential assembly: $75 to $175
- Commercial assembly (per device): $100 to $250
- Multi-device discounts: Many testers offer reduced per-unit pricing for properties with several assemblies
Some water districts include the cost of the initial test in your water bill. Others require you to hire and pay a tester directly. Check with your local water purveyor to understand your obligations.
Tips for a Smooth Inspection
- Schedule early. Don't wait until the compliance deadline is next week. Testers get slammed during peak testing season (often spring and early summer), and availability tightens fast.
- Confirm your tester is certified. Ask for their certification number and verify it with your state or local licensing authority. An uncertified test won't be accepted by your water district.
- Be available or arrange access. If the device is behind a locked gate or inside a mechanical room, make sure the tester can get in. Leave a key with a building manager or be present during the appointment.
- Keep records. Save a copy of your test report each year. If you sell the property or need to dispute a compliance notice, having your own records is invaluable.
- Plan for shutoff. During testing, your water supply to the protected line will be briefly interrupted — usually just a few minutes. Let tenants or building occupants know in advance so nobody is caught mid-shower.
What to Do Next
If you've received a testing notice, the single most important step is to schedule your test before the deadline. Use a directory like FindBackflowTesters.com to locate a certified tester in your area, compare credentials, and book the inspection. If your device has failed in the past or is more than 10 years old, ask the tester ahead of time whether they carry common repair parts so they can handle any issues in a single visit.
Backflow testing isn't complicated, but it is mandatory — and the consequences of ignoring it range from fines to losing water service. A 20-minute inspection once a year is a small price for keeping your property compliant and your community's drinking water safe.