What Backflow Test Failure Codes Actually Mean — And What to Do Next
What Backflow Test Failure Codes Actually Mean — And What to Do Next
Every backflow preventer installed on your water supply line gets tested annually. When it passes, you get a simple report and move on with your year. When it fails, you get a report with codes, abbreviations, and test values that can look like a foreign language.
Understanding what those failure codes mean helps you make better decisions about repairs, replacements, and timelines. Whether you own a home with an irrigation system or manage a commercial property with dozens of assemblies, knowing how to read a failed test report puts you in control of the conversation with your plumber and your water utility.
How Backflow Testing Works (Quick Refresher)
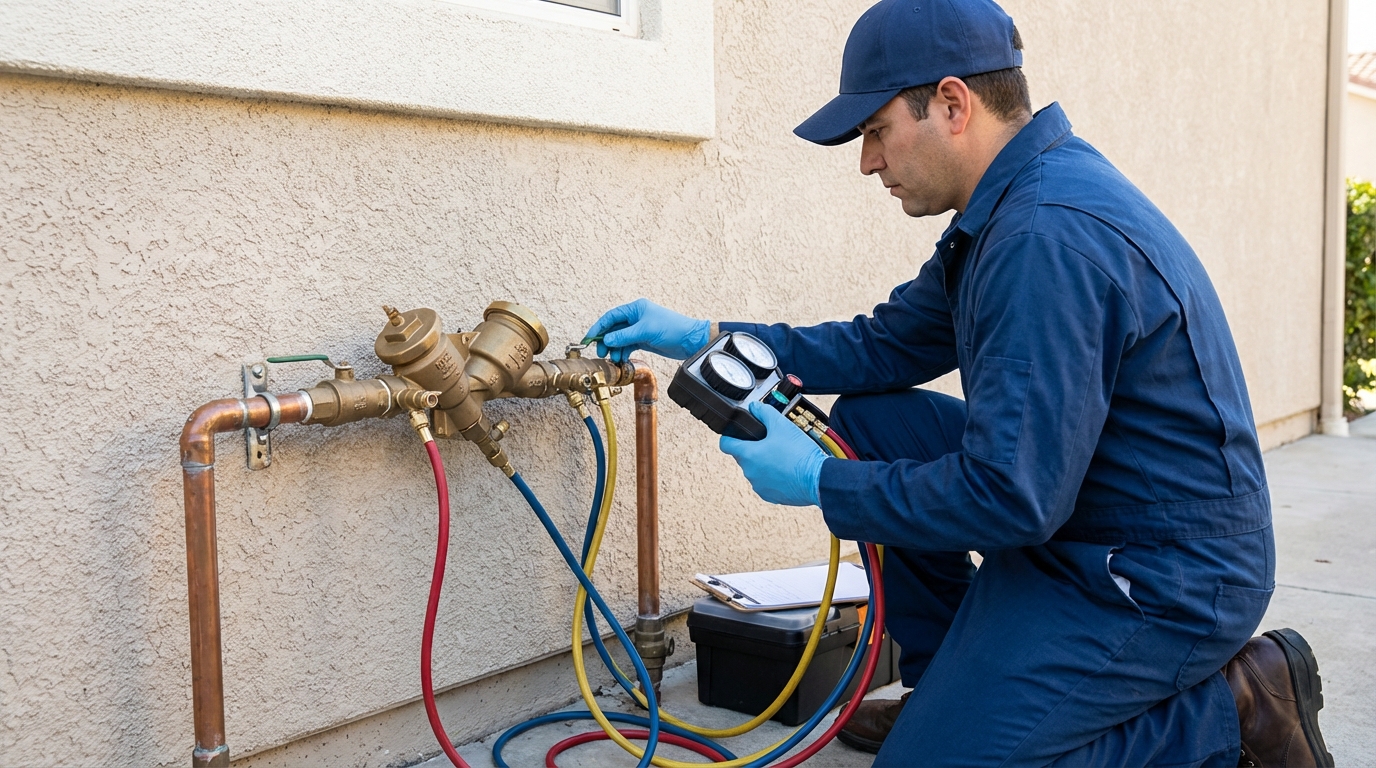
A certified backflow tester connects a differential pressure test kit to your backflow preventer assembly. They run a series of checks on each internal component — check valves, relief valves, air inlet valves, or shut-off valves depending on the type of device you have.
Each check produces a measurable result, usually in pounds per square inch (psi). Those results get compared against minimum performance standards set by the Foundation for Cross-Connection Control and Hydraulic Research (FCCCHR) or the American Society of Sanitary Engineering (ASSE). If a component doesn't meet the threshold, it fails, and the tester records a specific code or notation on the test report.
The four most common assembly types each have their own set of testable components:
- Reduced Pressure Zone (RPZ): First check valve, second check valve, and relief valve
- Double Check Valve Assembly (DCVA): First check valve and second check valve
- Pressure Vacuum Breaker (PVB): Air inlet valve and check valve
- Spill-Resistant Vacuum Breaker (SVB): Air inlet valve and check valve
Your test report will reference these components directly, and failure codes tie back to which component didn't perform.
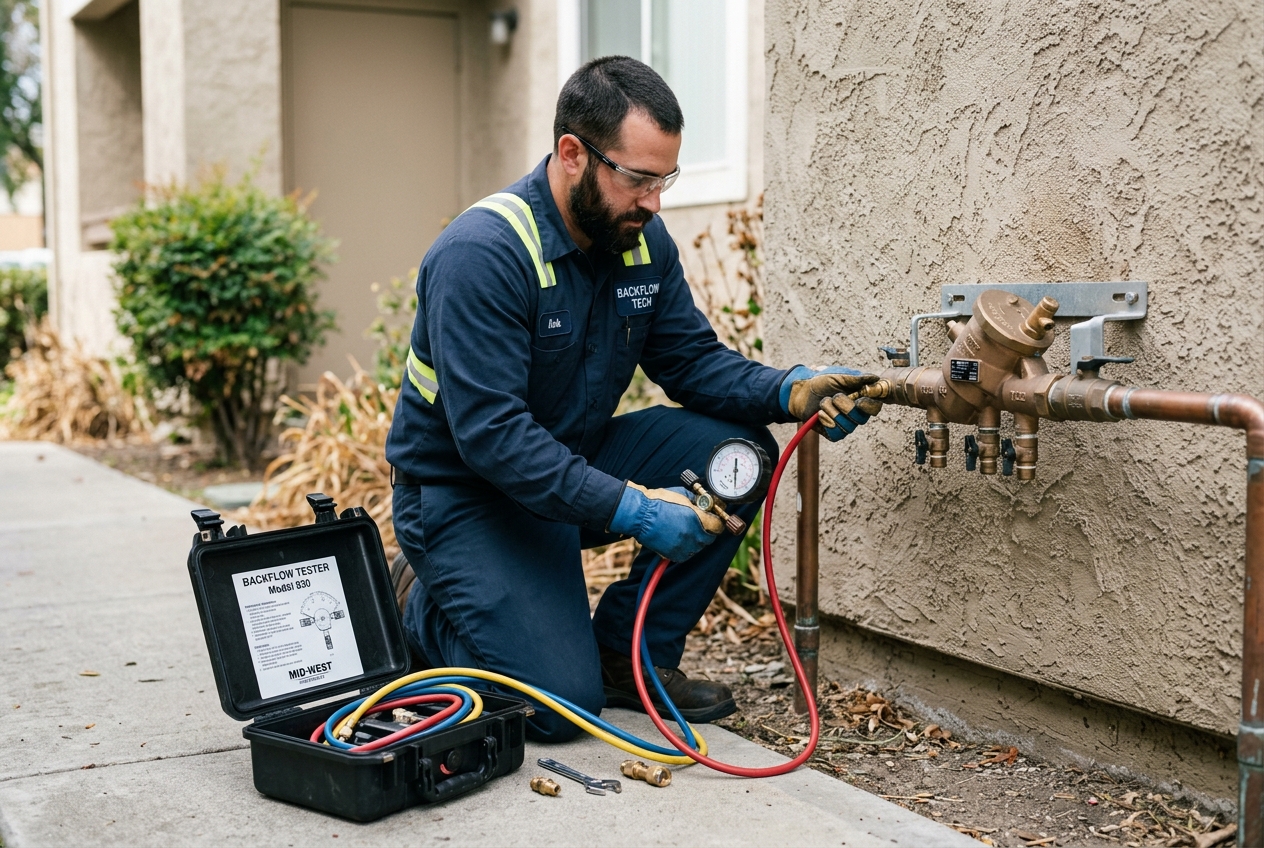 Backflow tester connecting a differential pressure gauge kit to an RPZ assembly mounted on an outdoor wall
Common Failure Codes and What They Tell You
Test report formats vary by jurisdiction and by the software or forms your tester uses. But the underlying failures fall into consistent categories. Here are the ones you'll encounter most often.
Check Valve Failures
Leaked / Did Not Hold
This is the most frequent failure. The tester pressurizes the system to isolate a check valve, and instead of holding pressure, it leaks. On the report, you might see notations like:
- "CV1 leaked" or "CV2 leaked"
- A recorded value below the minimum (e.g., 0.5 psi when the minimum is 1.0 psi for a DCVA check valve)
- "Failed closed tight" or "did not close tight"
What it means: The rubber disc, seat, or spring inside the check valve is worn, fouled with debris, or damaged. Water can push backward through the valve instead of being stopped.
Typical fix: A certified repair technician opens the assembly, inspects the check valve module, and replaces the rubber disc (also called a rubber kit), the spring, or the entire module. Parts for most residential assemblies run $15–$80. Labor is the larger cost.
Relief Valve Failures (RPZ Only)
Did Not Open / Opened Late
On an RPZ assembly, the relief valve is designed to open and dump water when pressure conditions become unsafe. During testing, if the relief valve doesn't open at the correct differential pressure (typically must open at or above 2.0 psi differential), it fails.
Common report notations:
- "RV did not open"
- "RV opened at 0.8 psi" (below the 2.0 psi minimum)
- "Relief valve sensing — failed"
What it means: The relief valve diaphragm is stuck, fouled, or degraded. The spring tension may be off. This is a serious failure because the relief valve is the last line of defense on an RPZ — it's the component that physically dumps contaminated water to the ground rather than letting it enter your drinking supply.
Did Not Close / Continuous Discharge
The opposite problem. The relief valve opens but won't reseat properly, causing continuous water discharge from the bottom of the assembly.
What it means: Debris is lodged in the relief valve seat, the diaphragm is warped, or internal corrosion is preventing a clean seal. You might actually notice this failure yourself before a test — it looks like your RPZ is constantly dripping or streaming water from its drain ports.
Typical fix: Relief valve rubber kit replacement. In severe cases, the entire relief valve module needs replacement. RPZ relief valve repairs tend to cost more than simple check valve repairs because the components are more complex.
Air Inlet Valve Failures (PVB and SVB)
Did Not Open
On a Pressure Vacuum Breaker, the air inlet valve must open when water pressure drops, allowing air into the line to break any siphon condition. During testing, if the air inlet doesn't open when it should, it fails.
Report notations:
- "Air inlet did not open"
- "Air inlet opened at [value] — below minimum"
- "Disc stuck closed"
What it means: The float or poppet inside the air inlet is stuck in the closed position due to mineral buildup, corrosion, or a failed spring. Without a functioning air inlet, the PVB can't prevent backsiphonage.
Typical fix: Cleaning and replacing the air inlet components. PVB internals are generally simpler and cheaper than RPZ parts. A repair kit for a common residential PVB might cost $20–$50 in parts.
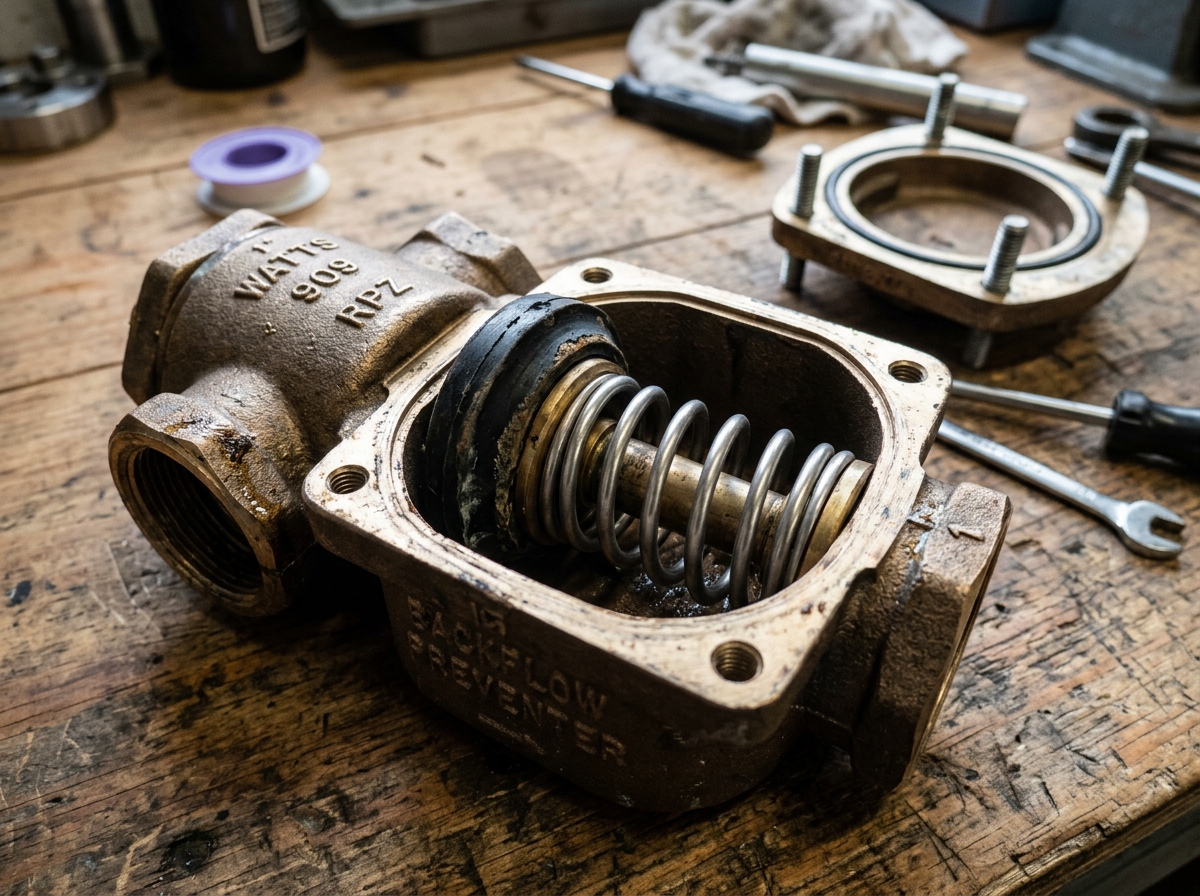 Close-up of a backflow preventer opened for repair showing internal rubber disc and spring components on a workbench
Reading the Numbers on Your Test Report
Beyond pass/fail codes, your test report includes actual measured values. Understanding the thresholds helps you gauge how close to failure your assembly was — even in a passing year.
Key Thresholds to Know
| Assembly Type | Component | Minimum to Pass |
|---|---|---|
| RPZ | Check valve #1 | 5.0 psi minimum |
| RPZ | Check valve #2 | 1.0 psi minimum |
| RPZ | Relief valve opening point | Must open at 2.0 psi differential or less |
| DCVA | Check valve #1 | 1.0 psi minimum |
| DCVA | Check valve #2 | 1.0 psi minimum |
| PVB | Air inlet | Must open when pressure drops 1.0 psi below opening point |
| PVB | Check valve | 1.0 psi minimum |
Note: These are standard FCCCHR/USC Manual of Cross-Connection Control thresholds. Your local water authority may have stricter requirements.
A check valve that passes at 1.2 psi this year when the minimum is 1.0 psi is technically passing but trending toward failure. A good tester will mention this in their notes. If you see values hovering just above the minimums, plan for a repair or parts replacement before next year's test.
What "Closed Tight" Means
You'll often see "closed tight" as a passing notation for check valves. This means the check valve held against the test pressure without any detectable leakage. It's the cleanest possible pass.
Why Assemblies Fail
Knowing the common root causes helps you prevent repeat failures:
Age and wear. Rubber components degrade over time regardless of water quality. Most manufacturers recommend replacing internal rubber kits every 5–8 years as preventive maintenance, even if the assembly is still passing.
Debris and sediment. Small particles of sand, rust, or mineral scale get caught between check valve discs and their seats. Even a tiny piece of grit can prevent a proper seal. Properties with older galvanized piping or well water are especially prone to this.
Freezing damage. In cold climates, water trapped inside the assembly can freeze and crack internal components or warp seats. This is one reason winterization matters for above-ground installations.
Improper installation. An assembly installed without adequate clearance, at the wrong orientation, or without proper drainage can experience premature component failure. RPZ assemblies installed in pits that flood are a common example — submerged relief valves corrode faster.
High water pressure. Sustained supply pressure above 80 psi accelerates wear on springs and rubber components. A pressure-reducing valve upstream of your backflow preventer can extend its service life.
What to Do After a Failed Test
A failed test isn't an emergency in most cases, but it does require action on a defined timeline. Here's the typical sequence:
1. Get the full report. Make sure your tester provides a complete report with specific failure codes, measured values, and component identification. "It failed" isn't enough information to get accurate repair quotes.
2. Understand your deadline. Most water utilities give you 30–60 days to repair and retest a failed assembly. Some jurisdictions are stricter — as few as 14 days. Your utility may charge penalties or, in extreme cases, disconnect water service for non-compliance. Check your local requirements immediately.
3. Get a repair quote. Many backflow testers are also certified to perform repairs. Getting a combined repair-and-retest from the same provider is often the most cost-effective approach. For a second opinion on complex or expensive failures, get quotes from two providers.
4. Consider repair vs. replacement. If your assembly is over 15 years old and has failed multiple years running, full replacement may be cheaper than ongoing annual repairs. Discuss the long-term math with your service provider. New residential assemblies typically cost $150–$500 for the unit itself, plus installation labor.
5. Schedule the retest. After repairs, the assembly must be retested by a certified tester and the passing report submitted to your water utility. Don't assume the repair alone closes the loop — the paperwork matters.
6. File your records. Keep copies of both the failed and passing reports. Property managers should maintain a log of all test results, repairs, and replacements for each assembly. This history helps predict future maintenance needs and demonstrates compliance during inspections.
 Property manager reviewing a backflow test report document at a desk with a laptop showing a compliance tracking spreadsheet
When a Failure Code Means Bigger Problems
Most failures are straightforward component wear. But some patterns warrant deeper investigation:
- Repeated relief valve discharge (RPZ): If your RPZ relief valve continuously dumps water between tests, there may be a backpressure condition in your system that the assembly is actively protecting against. This isn't just a parts issue — you need a cross-connection survey.
- Both check valves failing simultaneously: Could indicate a systemic issue like severe sediment, water hammer, or a pressure spike event.
- New assembly failing on first test: Points to an installation defect or a defective unit. This should be covered under warranty.
In any of these cases, a qualified cross-connection control specialist — not just a general plumber — should evaluate the full installation.
Finding a Certified Tester or Repair Technician
Backflow testing and repair require specific certification in every state. General plumbing licenses don't automatically cover backflow work. When choosing a provider:
- Verify their certification is current with your local water authority
- Confirm they carry the proper test kit calibration records (kits must be calibrated annually)
- Ask whether they handle both testing and repair, which streamlines the process
- Check that they submit reports directly to your water utility on your behalf
If your assembly recently failed and you need a certified professional, you can search by zip code on FindBackflowTesters.com to find testers in your area who handle both testing and repairs.
Key Takeaways
Failed backflow tests are common and usually repairable. The failure codes on your report tell you exactly which component needs attention, and most repairs involve replacing inexpensive rubber parts and springs. The real cost is labor and the retest.
Read your report carefully, understand your repair deadline, and work with a certified professional who can handle the repair and retest in one visit. Keep your records organized, watch for trending values that suggest next year's failure, and consider preventive maintenance to avoid the hassle of emergency repairs on a compliance deadline.