Complete Guide to Winterizing Your Backflow Preventer (2024)

Understanding the Importance of Winterizing Your Backflow Preventer
As temperatures begin to drop, protecting your backflow preventer from freeze damage becomes crucial. A frozen backflow preventer can crack, burst, or suffer internal damage that compromises its ability to protect your water supply from contamination. Beyond the safety concerns, replacing a damaged backflow preventer can cost anywhere from $1,500 to $5,000, making proper winterization a smart financial decision.
Backflow preventers are particularly vulnerable to freezing because they contain water that remains static between uses. When this water freezes, it expands by approximately 9%, creating tremendous pressure that can destroy internal components, crack the brass body, or burst pipes. Even if the damage isn't immediately visible, freeze-related stress can weaken the device and lead to failure during your next annual certification test.
When to Start Winterizing Your Backflow Preventer
The timing of winterization depends on your geographic location and local climate patterns. As a general rule, begin winterization procedures when:
- Nighttime temperatures consistently drop below 40°F (4°C)
- The first frost warning is issued for your area
- October 1st in northern climates
- November 15th in moderate climates
- December 1st in southern regions that occasionally experience freezing
Don't wait until the first freeze warning to act. Sudden cold snaps can catch property owners off guard, and scheduling professional winterization services becomes difficult when everyone needs help simultaneously.
Types of Backflow Preventers and Their Winterization Needs
Pressure Vacuum Breakers (PVB)
PVBs are the most common residential backflow preventers and require complete winterization. Their above-ground installation makes them especially vulnerable to freezing temperatures. Key components at risk include:
- Check valve assemblies
- Air inlet valve
- Test cocks
- Shutoff valves
Reduced Pressure Zone Assemblies (RPZ)
RPZs contain more water than PVBs and feature a relief valve that can freeze in the open position. Their complex internal mechanisms make proper winterization essential. Critical areas include:
- Relief valve chamber
- Both check valve zones
- Four test cocks
- Differential pressure relief valve
Double Check Valve Assemblies (DCVA)
While sometimes installed in vaults below the frost line, above-ground DCVAs need thorough winterization. Focus areas include:
- Dual check valve chambers
- Test cock assemblies
- Valve body water retention areas
Step-by-Step Winterization Process
Materials and Tools Needed
Before beginning winterization, gather these essential items:
- Air compressor (minimum 50 PSI capacity)
- Air hose with proper fittings
- Adjustable wrenches
- Bucket or container for water drainage
- Insulation materials (if leaving in place)
- Thread seal tape
- Service tags or labels
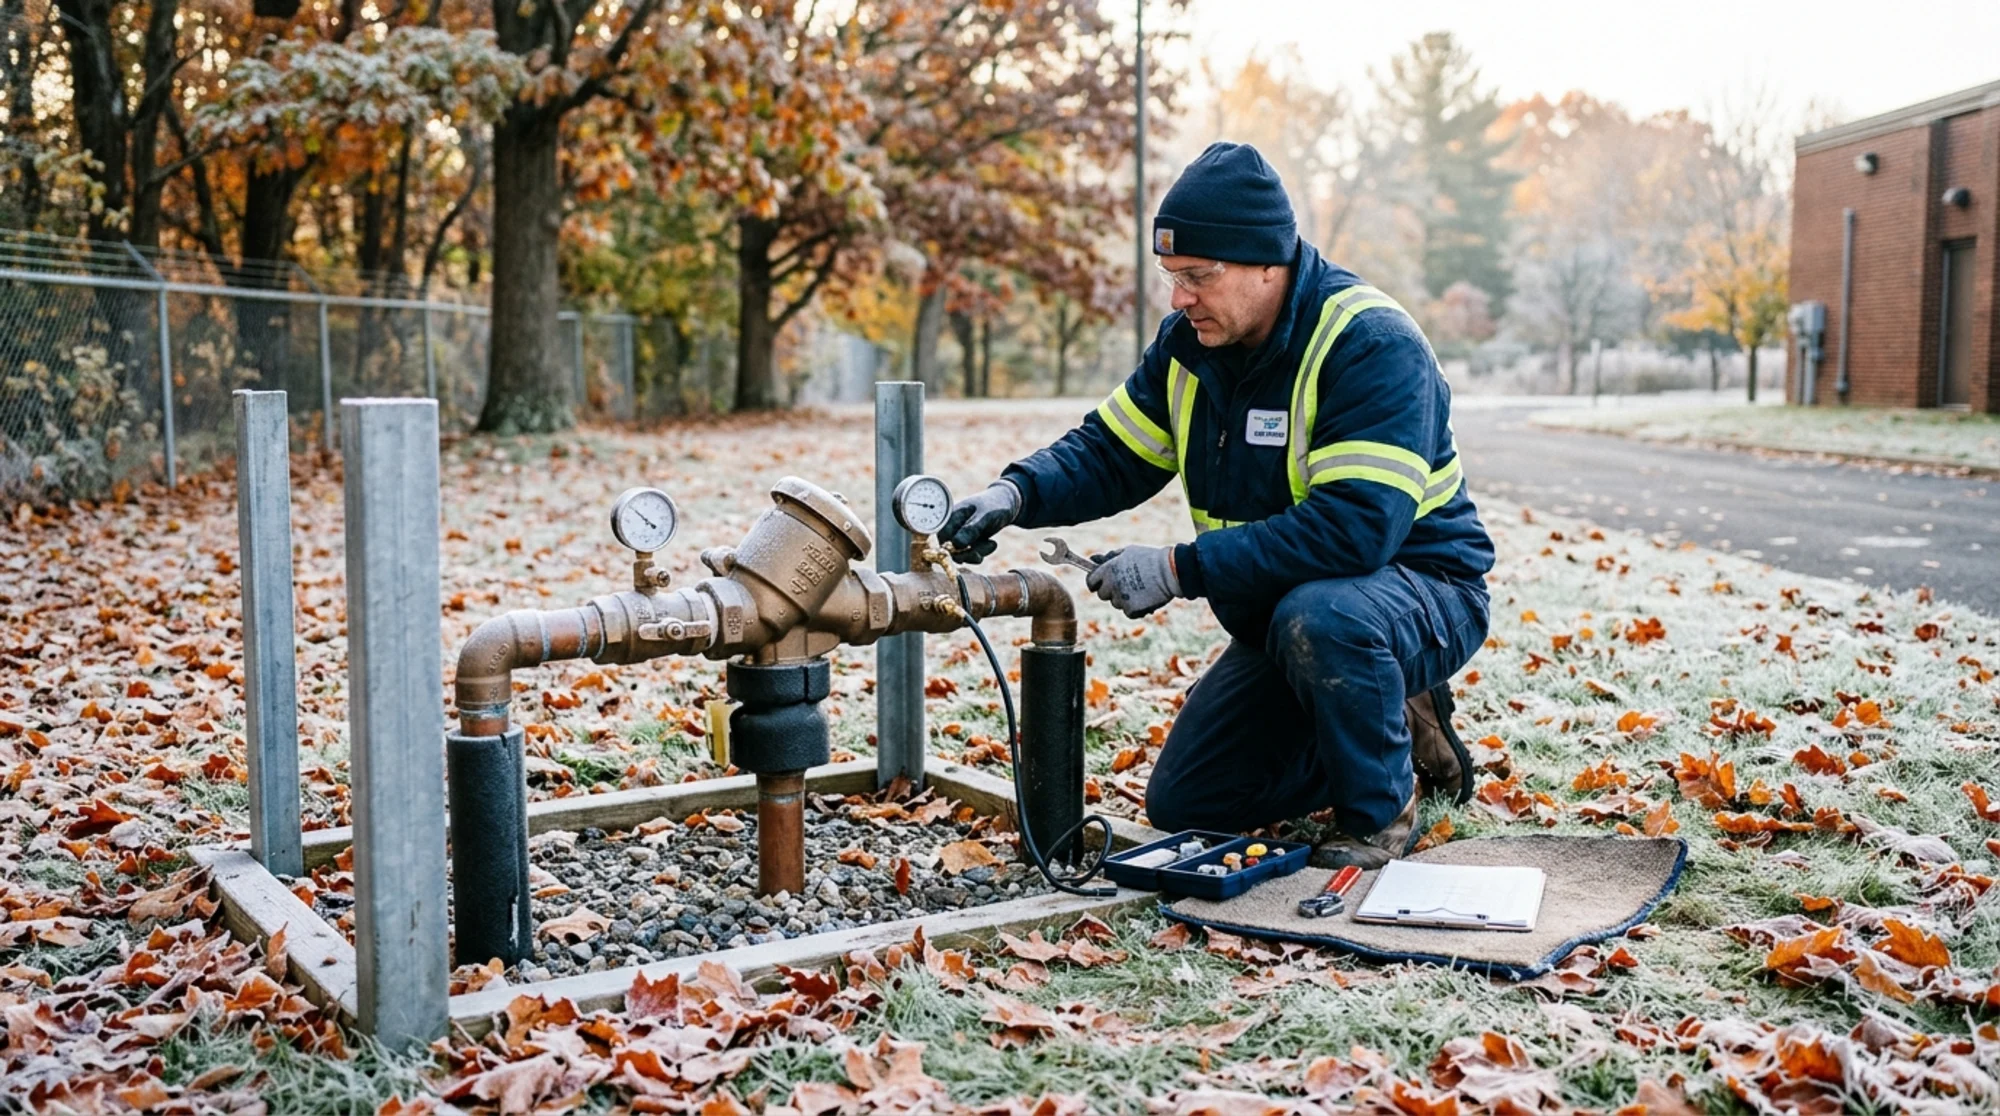
Professional Winterization Procedure
Step 1: Shut Off Water Supply
- Locate the upstream shutoff valve
- Close it completely by turning clockwise
- Verify water flow has stopped
Step 2: Open Test Cocks
- Start with test cock #1 (closest to supply)
- Open each test cock using a screwdriver
- Allow initial water drainage
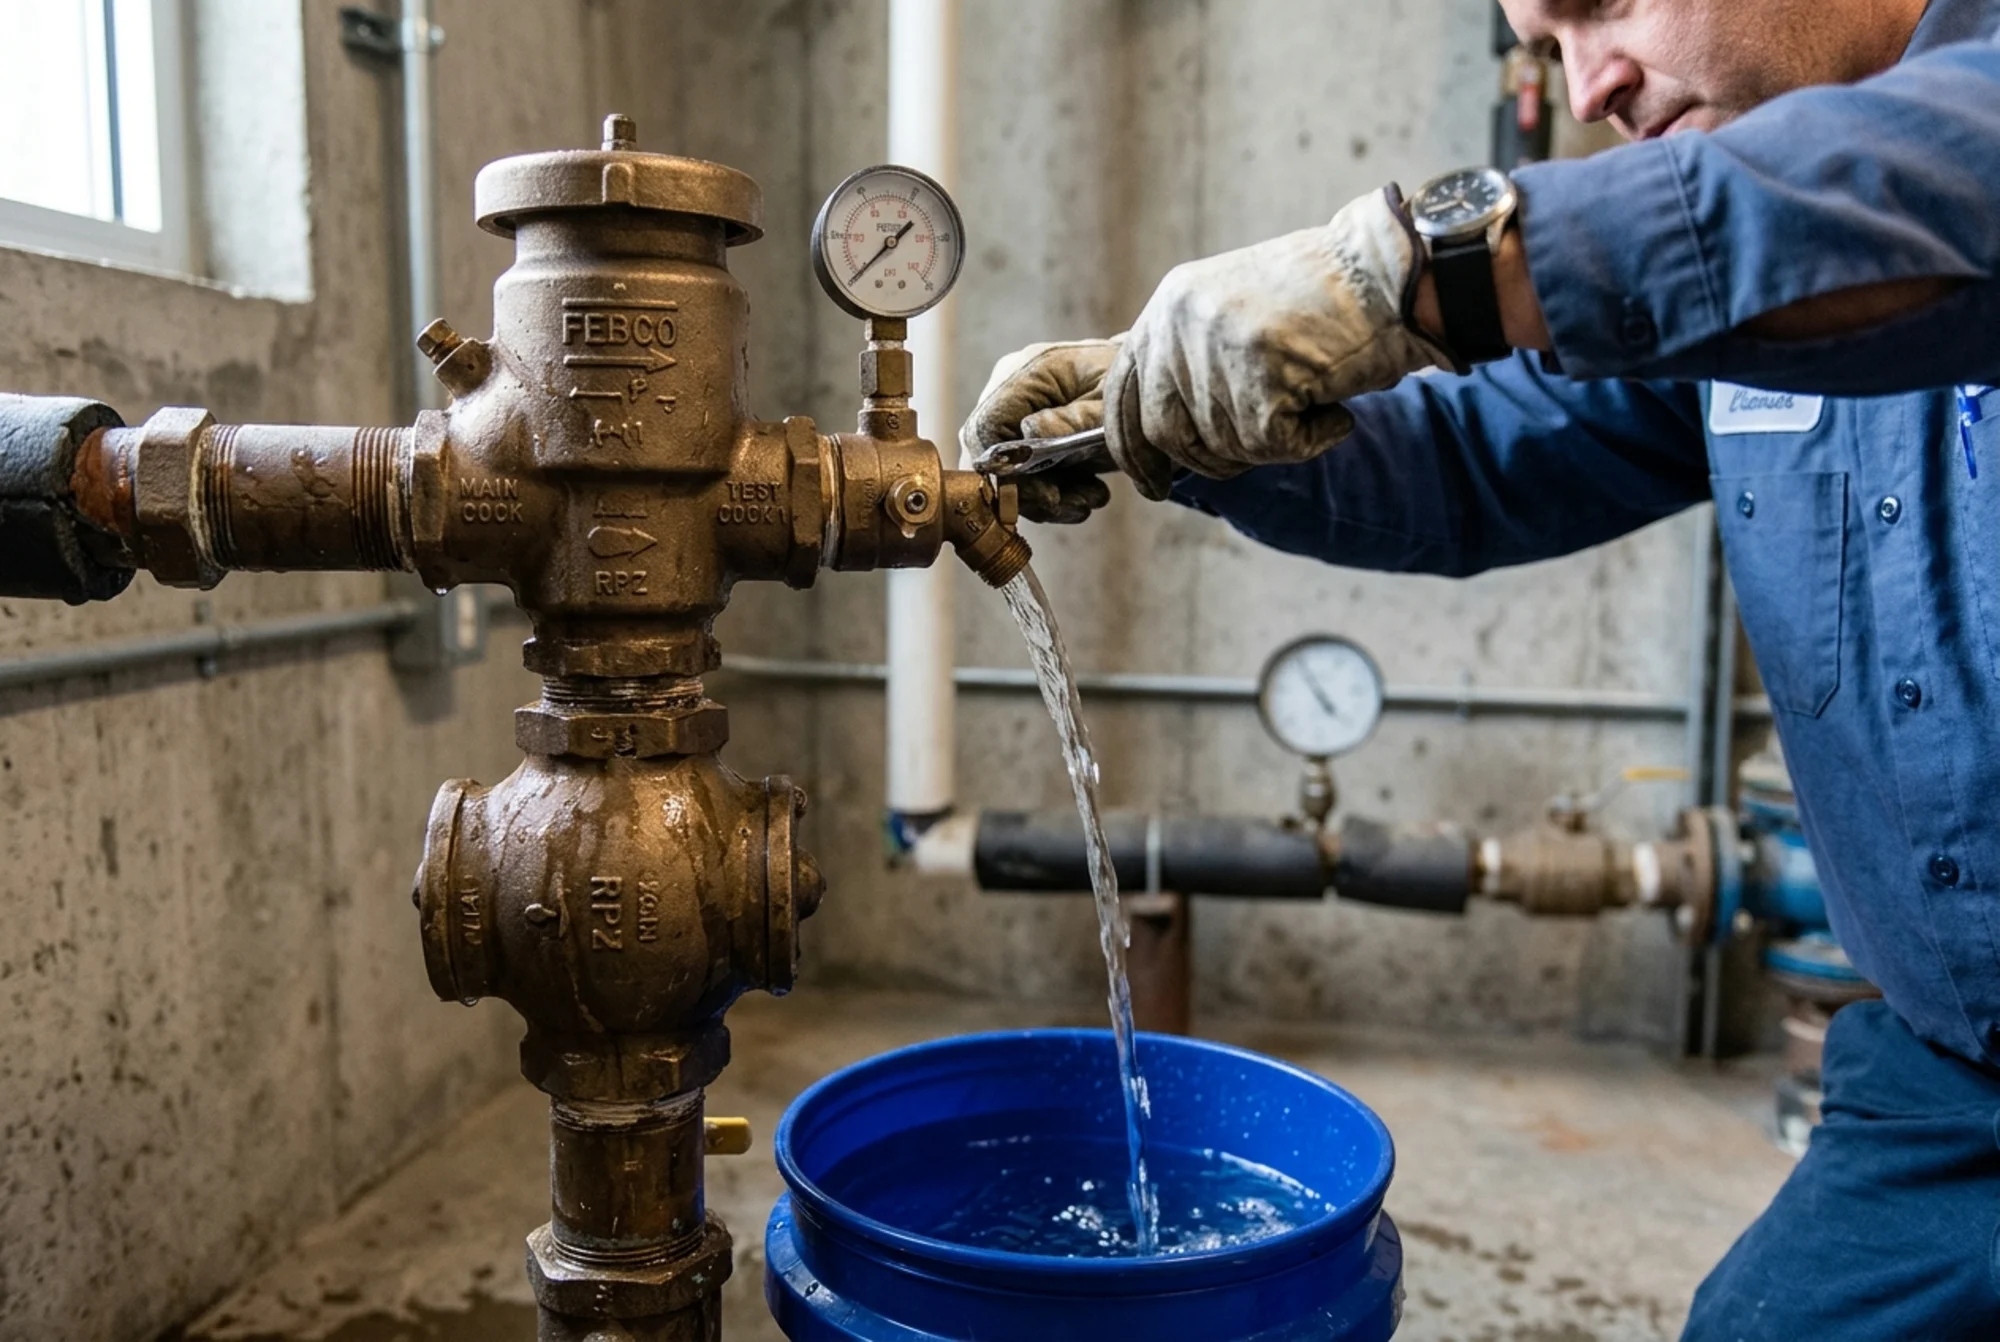
Step 3: Drain the Device
- Open downstream shutoff valve
- Remove drain plugs if present
- Let gravity drain water for 5-10 minutes
Step 4: Compressed Air Blowout
- Connect air compressor to test cock #1
- Set pressure to 30-50 PSI (never exceed manufacturer specifications)
- Blow air through system for 30-60 seconds
- Repeat for each test cock
Step 5: Final Drainage
- Open all ball valves to 45-degree angle
- This prevents water accumulation while maintaining security
- Ensure relief valve (RPZ) drains completely
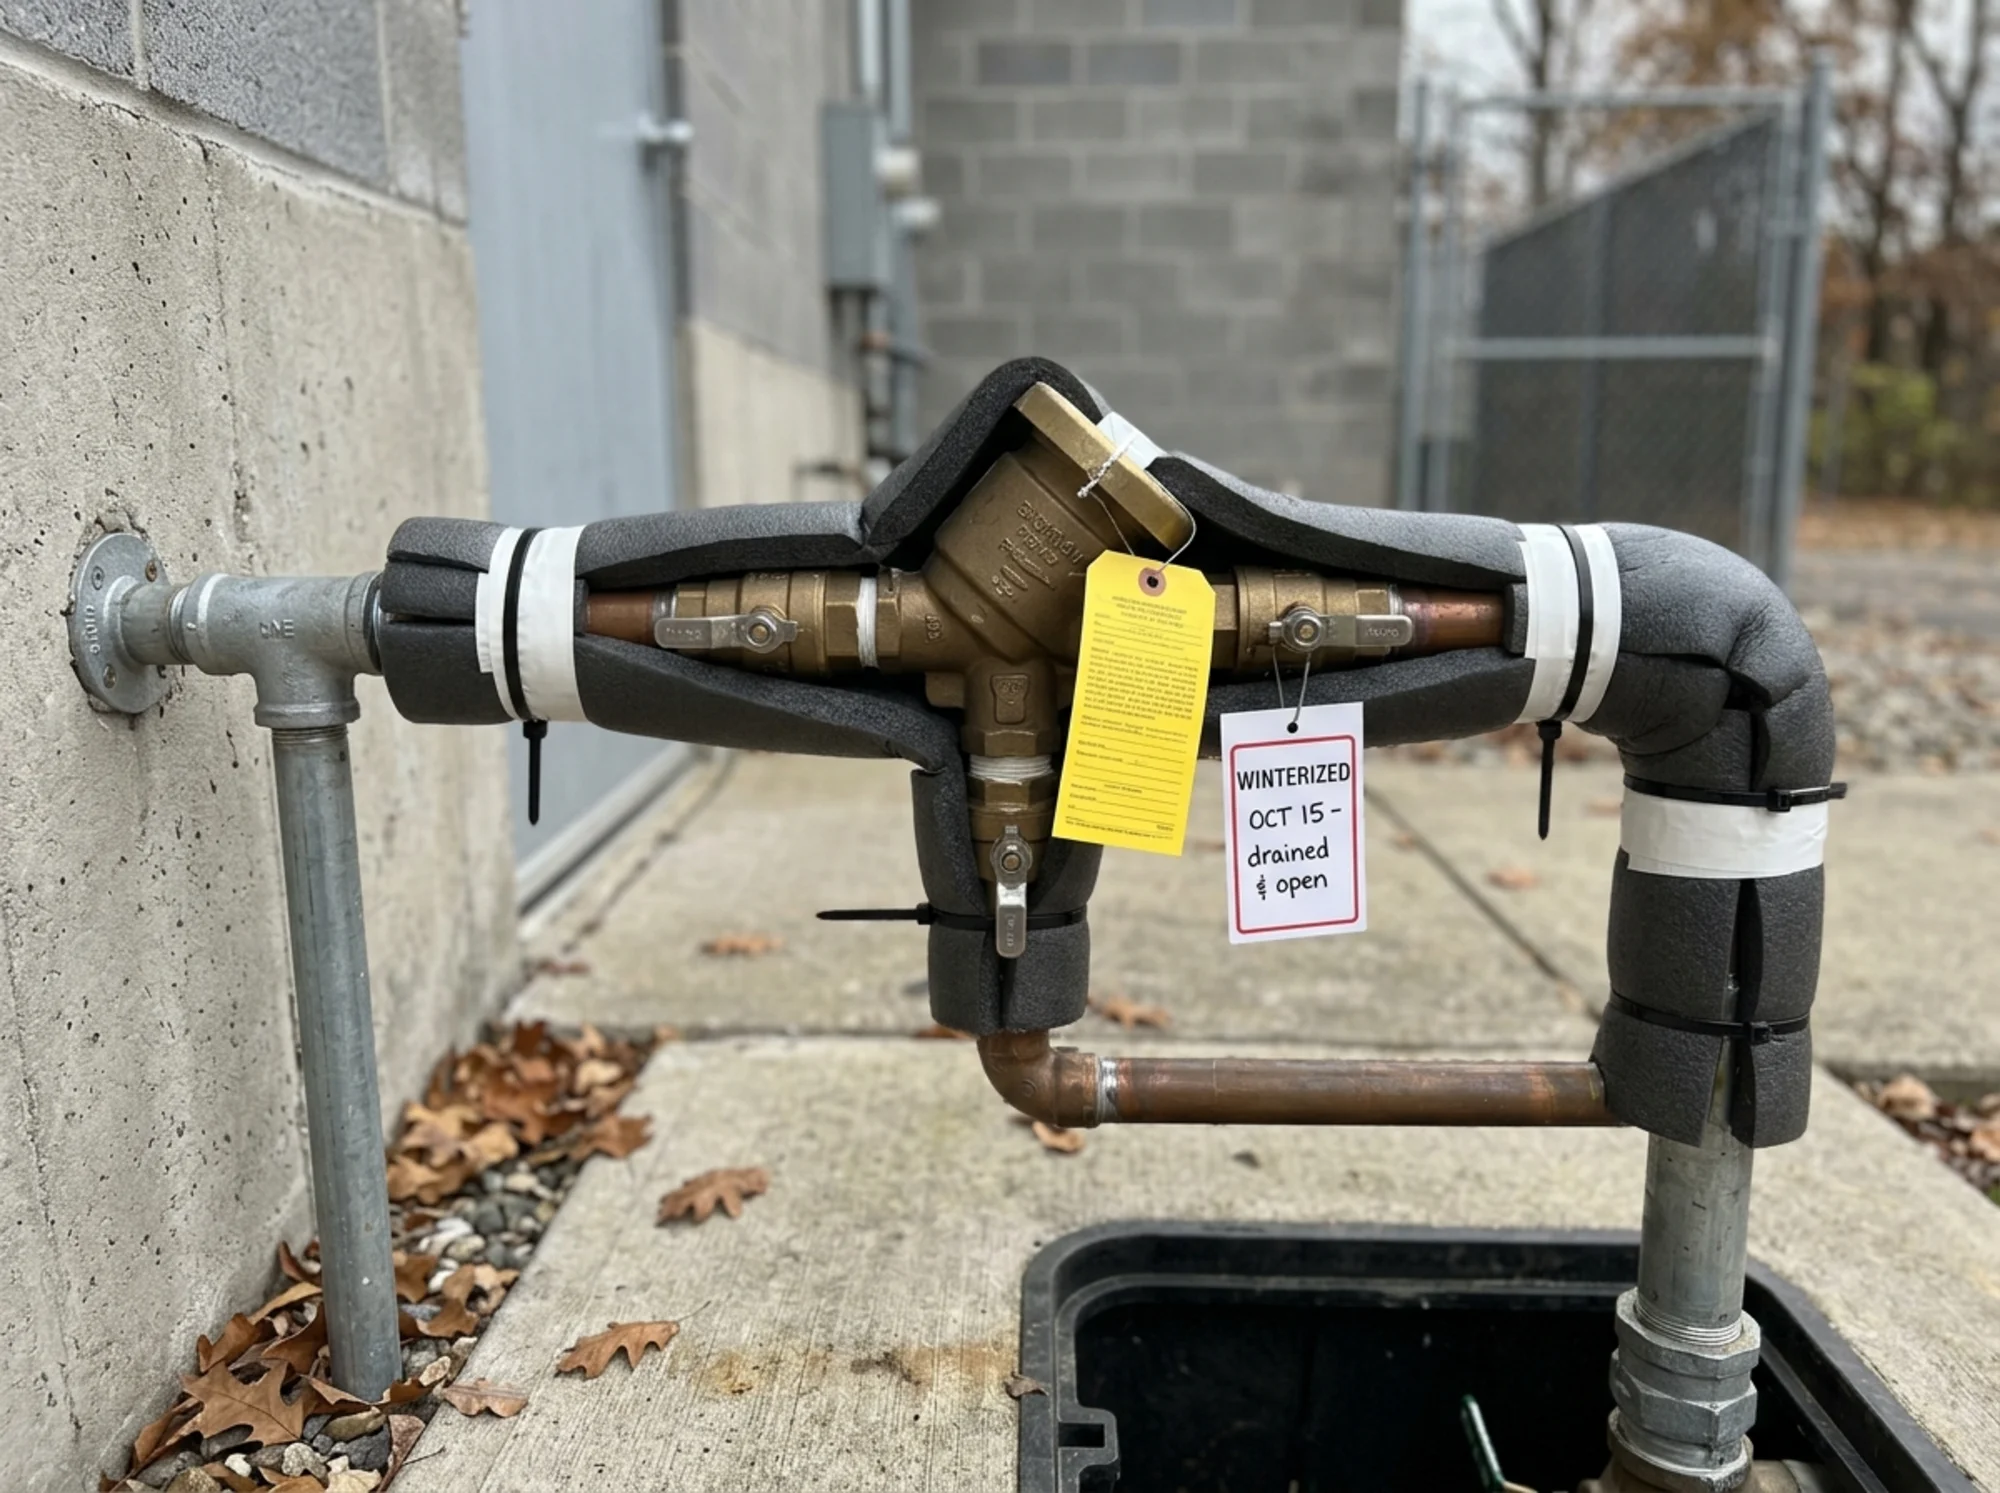
Step 6: Secure the Installation
- Leave test cocks open for winter
- Tag device as "Winterized - Do Not Use"
- Document date and technician information
Alternative Winterization Methods
Insulation Method
For mild climates or temporary cold spells, insulation can provide adequate protection:
- Wrap all exposed piping with foam pipe insulation
- Cover the entire assembly with an insulated enclosure
- Seal all gaps to prevent cold air infiltration
- Install heat tape on particularly vulnerable sections
- Monitor temperatures inside the enclosure
Important: This method only works where temperatures rarely drop below 25°F (-4°C) for extended periods.
Removal Method
Some jurisdictions allow complete removal of the backflow preventer:
- Obtain necessary permits from local water authority
- Document the device location and configuration
- Cap supply lines according to code
- Store device in climate-controlled area
- Schedule spring reinstallation and testing
Heat Trace Systems
Modern heat trace cables offer automated protection:
- Self-regulating cables adjust heat output based on temperature
- Thermostat controls activate only when needed
- Insulated enclosures maximize efficiency
- Annual inspection ensures proper operation
Common Winterization Mistakes to Avoid
Insufficient Drainage
The most frequent error is failing to remove all water from the system. Water collects in:
- Low points in piping
- Check valve seats
- Test cock assemblies
- Relief valve chambers
Always use compressed air to ensure complete water removal.
Over-Pressurization
Excessive air pressure can damage internal components:
- Never exceed 50 PSI during blowout
- Use regulated air supply with pressure gauge
- Short bursts prevent seal damage
- Monitor for unusual sounds indicating stress
Improper Valve Positioning
Leaving valves fully open or closed traps water:
- 45-degree angle allows drainage while preventing contamination
- Document valve positions for spring startup
- Tag each valve with winter position
Neglecting Test Cocks
Test cocks are particularly vulnerable:
- Must remain open all winter
- Remove caps to prevent water accumulation
- Apply light oil to prevent corrosion
- Cover openings with mesh to keep insects out
Spring Startup Procedures
Proper de-winterization is as important as winterization:
Pre-Startup Checklist
- Inspect for visible damage from winter weather
- Verify all test cocks are still open
- Check valve positions match winterization tags
- Remove any insulation or protective coverings
- Clear debris from relief valve ports
Startup Sequence
- Close all test cocks firmly but not overtightened
- Position ball valves to full open position
- Slowly open upstream water supply
- Check for leaks at all connection points
- Test relief valve operation (RPZ units)
- Schedule certification test within 30 days
Post-Startup Testing
A certified backflow tester should verify:
- Proper check valve operation
- Correct differential pressure
- Relief valve function
- Overall assembly condition
Regional Considerations and Regulations
Northern Climate Requirements
States like Minnesota, Wisconsin, and Maine often require:
- Mandatory removal or complete drainage by October 1st
- Licensed professional winterization
- Spring recertification before May 1st
- Annual winterization records submission
Moderate Climate Guidelines
Areas with occasional freezing need:
- Weather-based triggers for winterization
- Approved insulation methods for minimal protection
- Emergency protocols for unexpected cold snaps
Local Water Authority Rules
Always check with your water provider for:
- Specific winterization deadlines
- Approved methods and materials
- Documentation requirements
- Penalties for freeze damage
Cost Considerations
Professional Winterization Services
Typical costs range from:
- Basic drain and blow-out: $75-$150
- Full winterization with insulation: $150-$300
- Removal and storage: $200-$400
- Heat trace installation: $500-$1,500
DIY vs. Professional Services
While some homeowners attempt DIY winterization, consider:
- Liability for contamination if done incorrectly
- Warranty voiding on newer devices
- Insurance coverage may require professional service
- Time and equipment investment
Maintenance Beyond Winterization
Year-Round Protection Strategies
Extend device life with:
- Quarterly visual inspections
- Annual professional testing
- Prompt leak repairs
- Vegetation management around installation
- Drainage system maintenance
Record Keeping
Maintain documentation of:
- Winterization dates and methods
- Service provider information
- Spring startup procedures
- Any repairs or modifications
- Test results and certifications
Conclusion
Properly winterizing your backflow preventer protects both your water supply and your wallet. Whether you choose professional services or tackle some aspects yourself, following these comprehensive procedures ensures your device survives winter's challenges intact. Remember that regulations vary by location, so always consult local authorities and certified professionals when in doubt.
Start planning your winterization strategy before the first freeze threatens your system. Schedule professional services early, gather necessary materials, and maintain detailed records of all procedures. Your diligence today prevents costly repairs and potential health hazards tomorrow.
For professional backflow testing and winterization services in your area, use our directory at FindBackflowTesters.com to locate certified technicians who understand local requirements and can ensure your system receives proper care throughout the winter months.